Create a Tab Bar
Home, Shop, Search, Cart — one tap away on every page. Three short stages: create it, set it up, publish it.
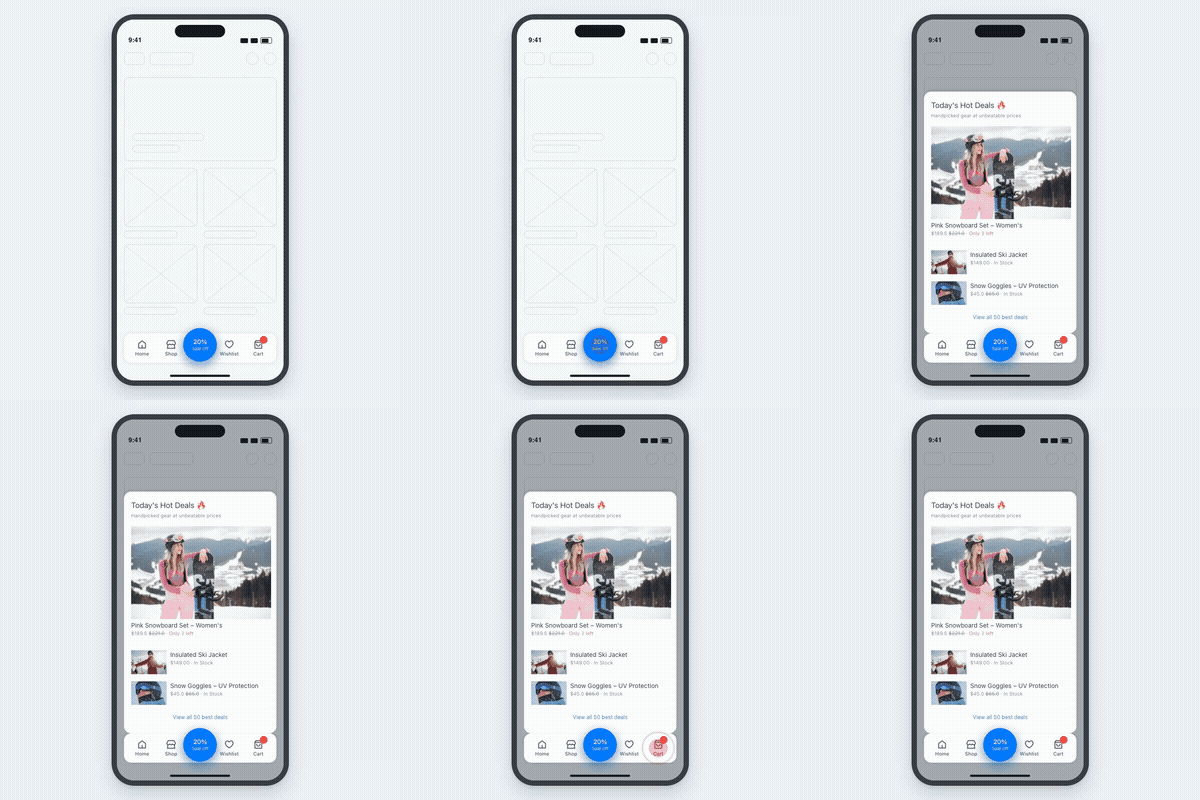
Before you begin
- Navi+ is installed and the app embed is on — Turn on the Navi+ app embed.
1. Create it
The quickest way is to let Navi+ build the bar from your store, then adjust what it proposes.
-
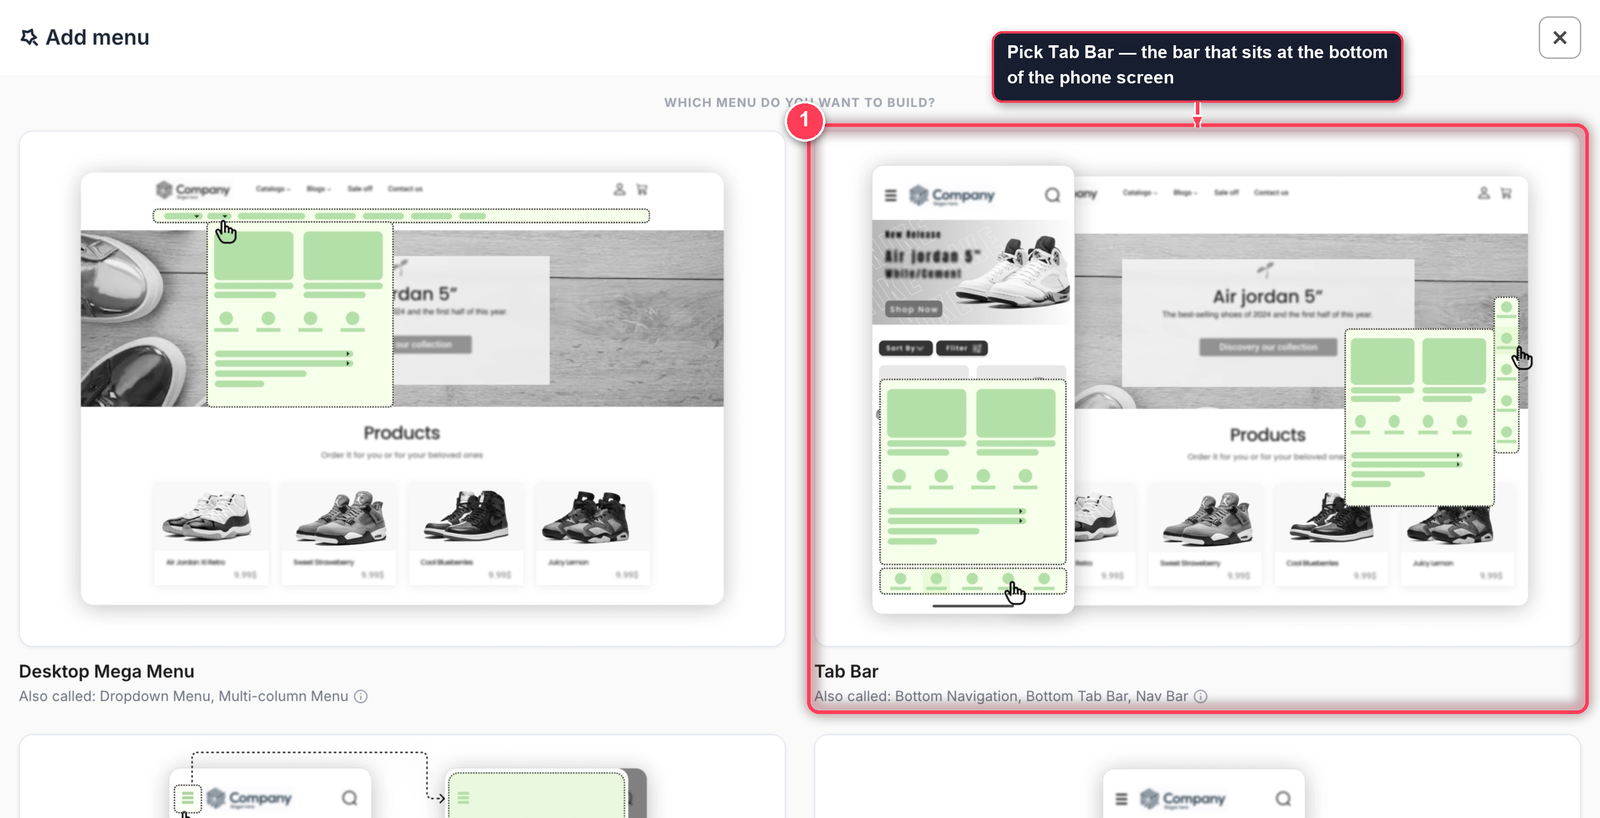
In Navi+, click Add menu. Navi+ asks which menu you want to build — pick Tab Bar.
-
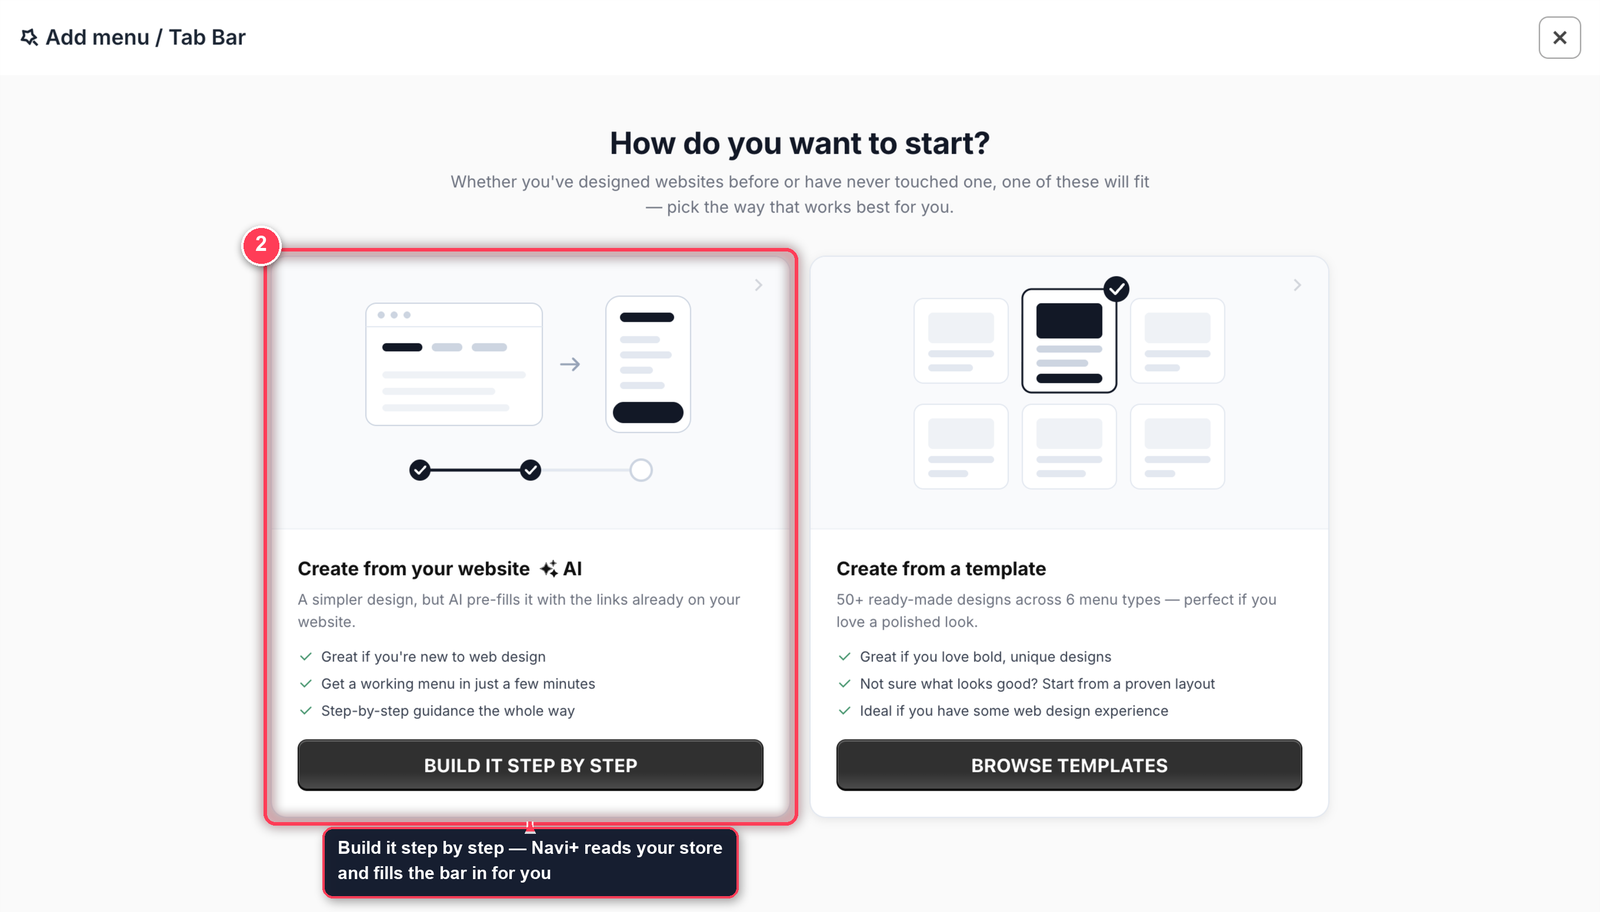
Choose Build it step by step. Navi+ reads the navigation already on your store and fills the bar in for you — you only correct what you don’t like.
-
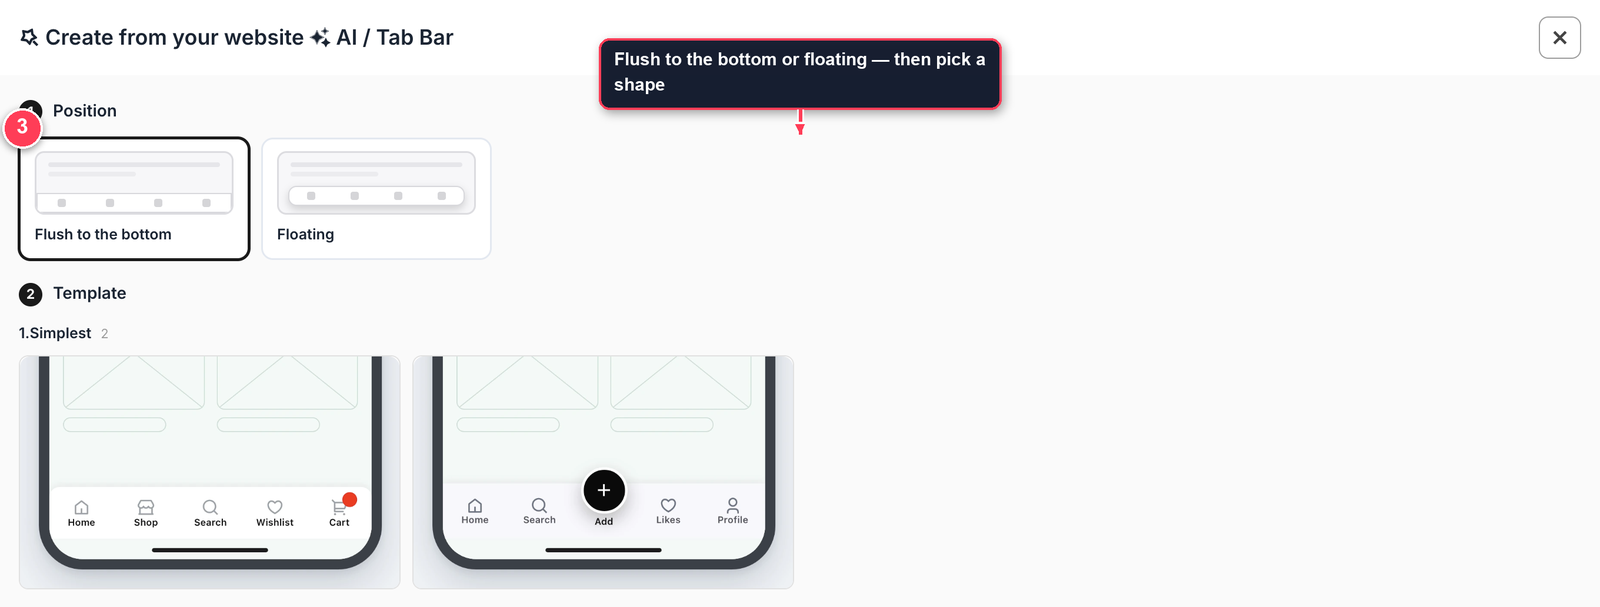
Pick where the bar sits — flush to the bottom or floating — then pick a shape. Choosing a shape opens the next screen straight away.
-
Your items are already there — Home, Shop, Search, Wishlist, Cart, each with an icon and a link taken from your store. Rename anything, repoint a link, swap an icon, or remove a row. Three to five items is the sweet spot.
Switch a row from Link to Submenu if you want that item to open a panel instead of going straight to a page. There’s also a checkbox to show the bar on desktop — off by default, because a Tab Bar is made for phones.
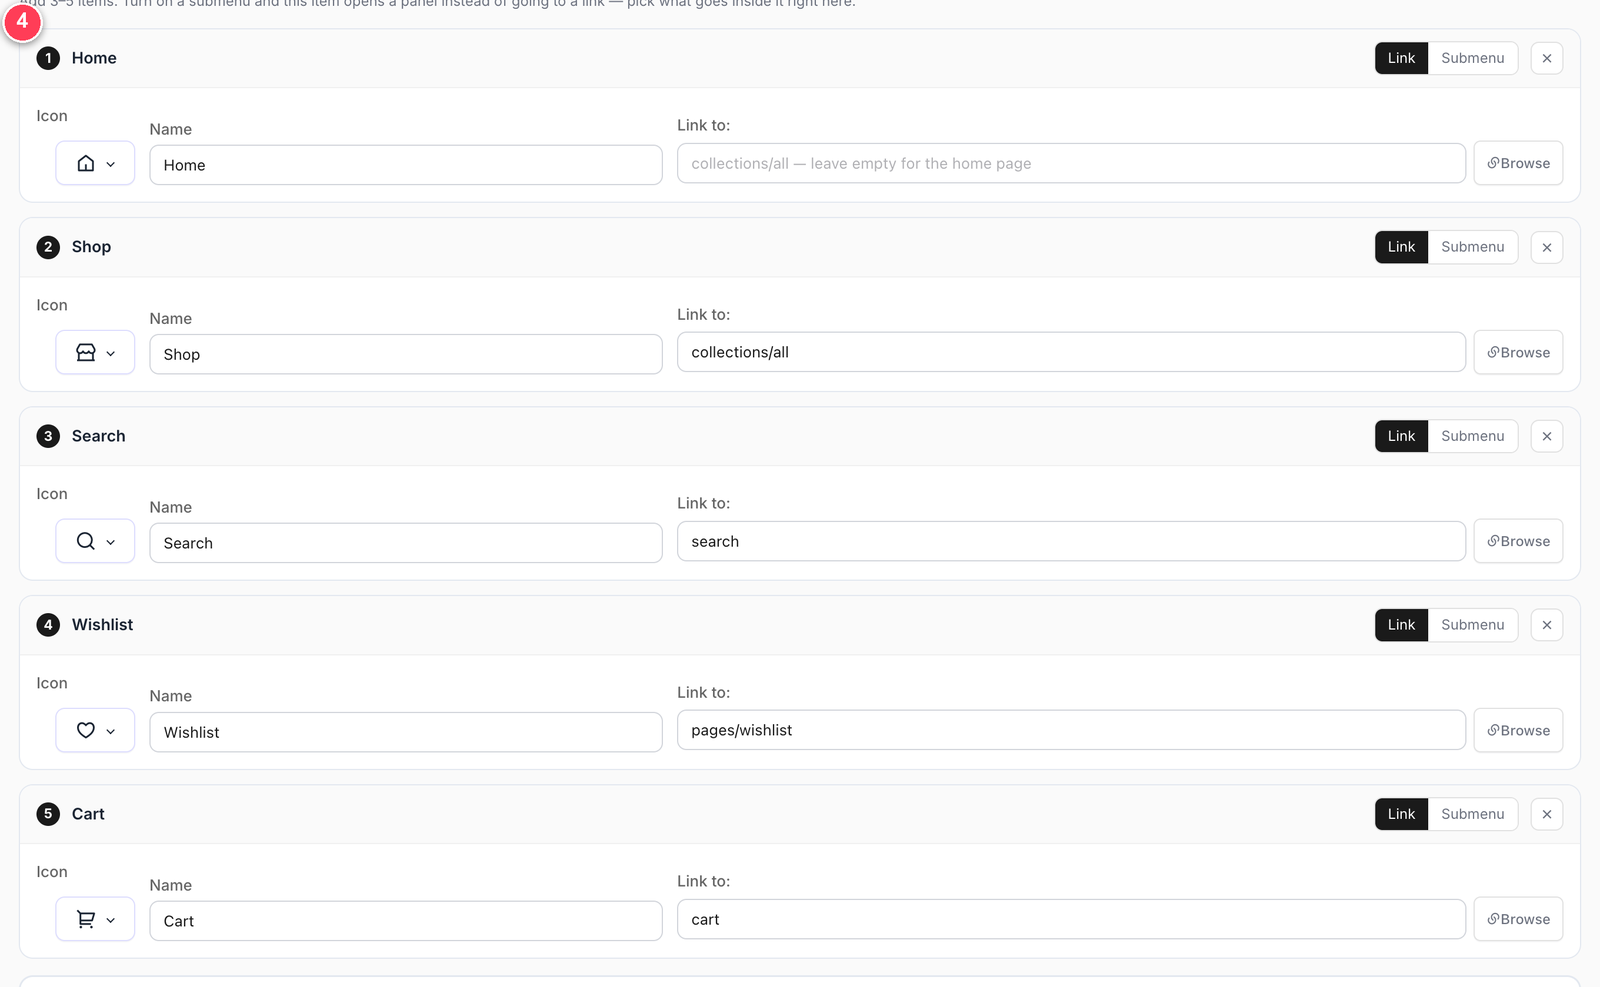
Navi+ filled these in from your store — everything here is editable. -
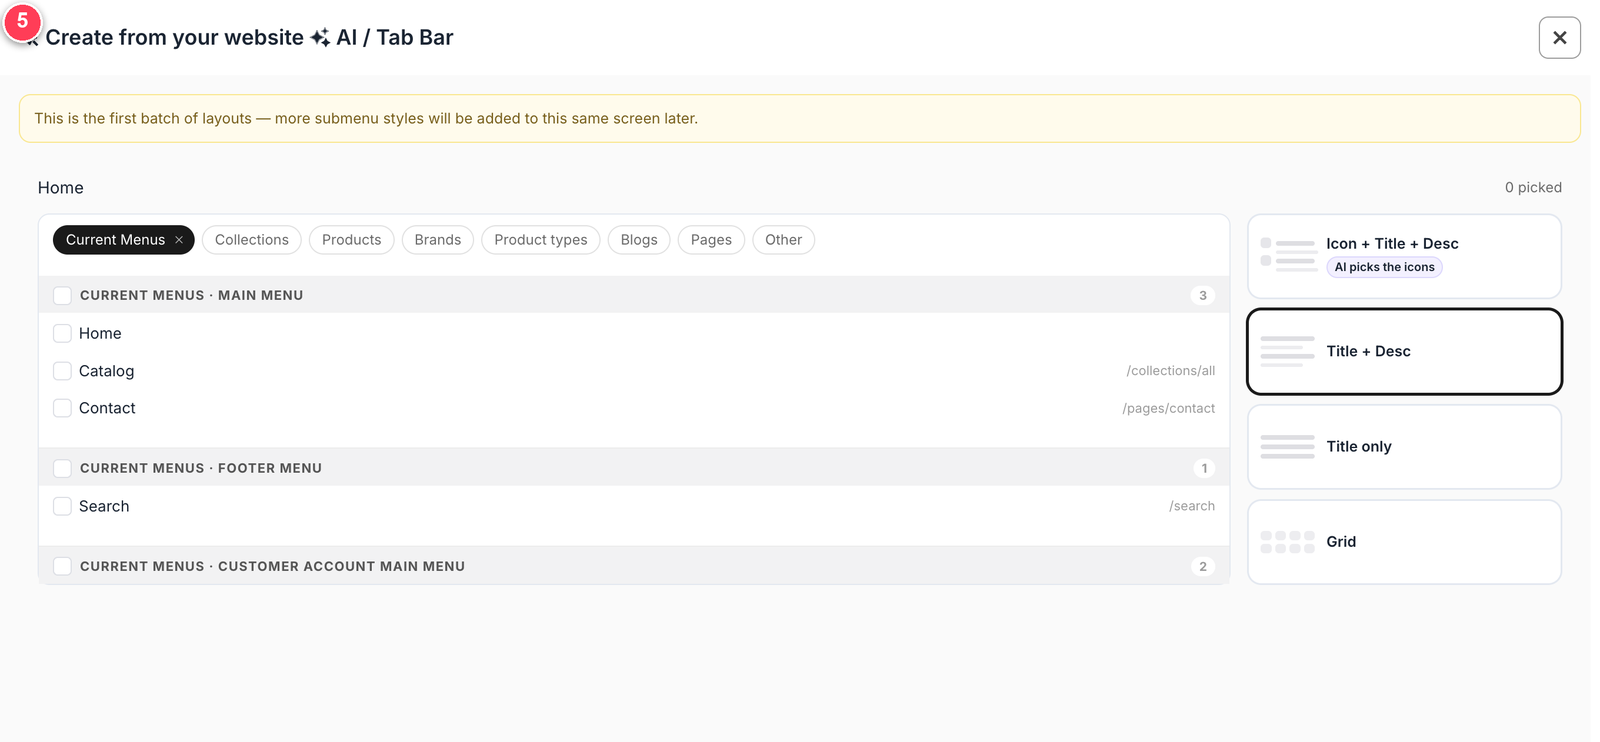
If you turned on a submenu, one more screen asks what goes inside it: pick the links (your Shopify menus, collections, products, blogs, pages) and one layout that applies to every submenu. “Icon + Title + Desc” lets AI choose an icon per link.
-
Click Generate menu. Navi+ builds the bar and opens it in the editor.
Prefer to start from a finished design?
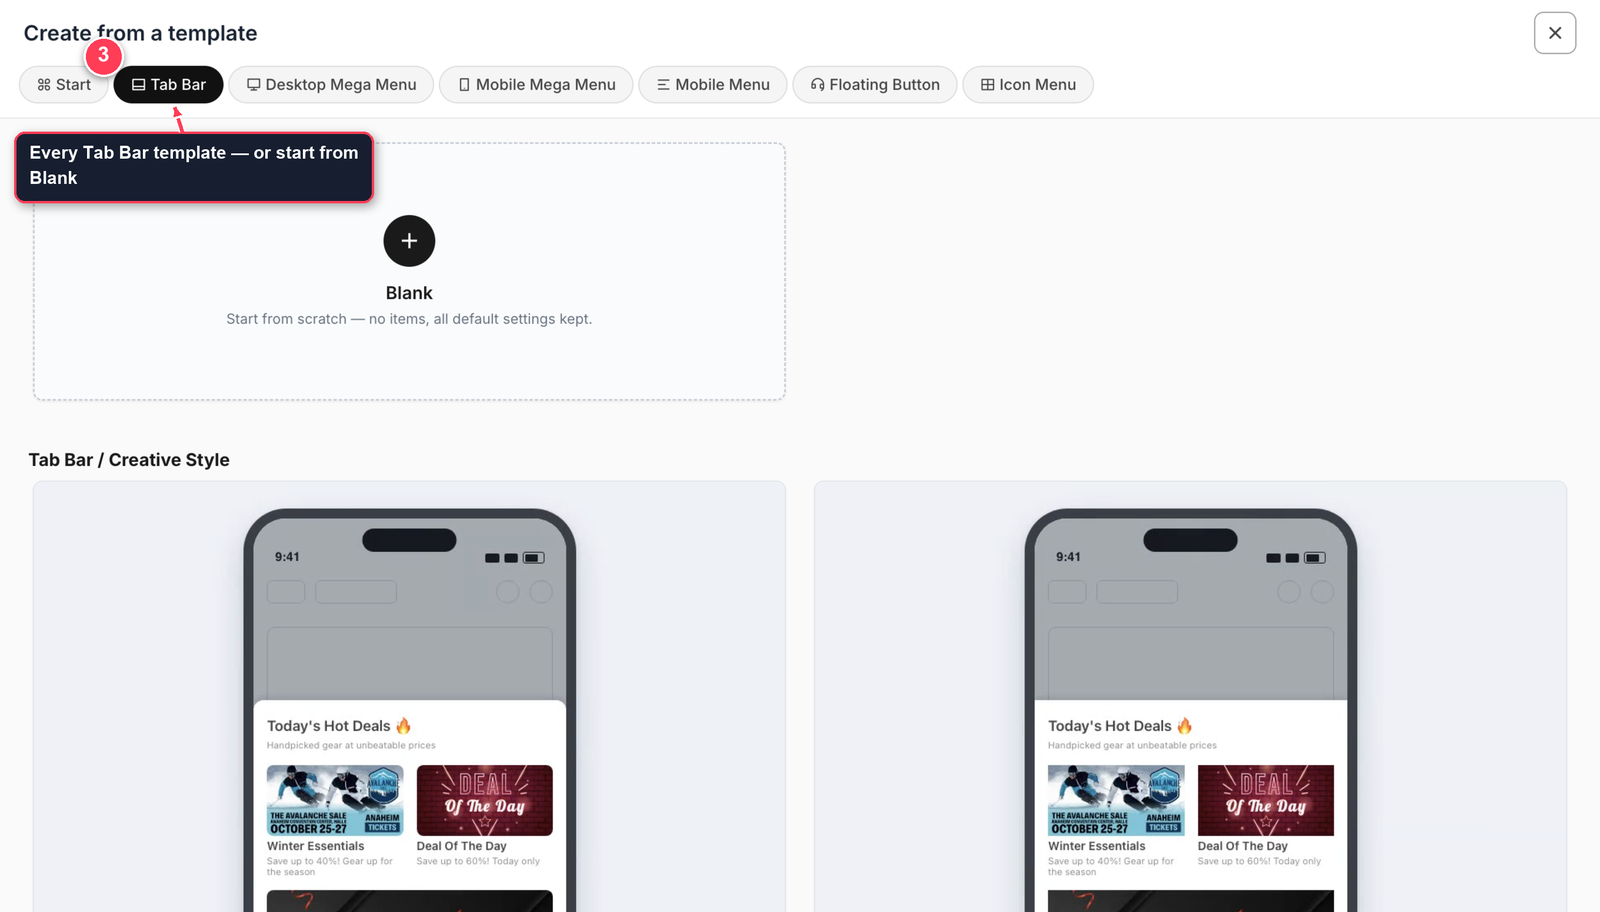
At step 2, choose Browse templates instead. You get the full Tab Bar gallery — or Blank for an empty bar — and the menu opens in the editor with nothing to fill in first.
2. Set it up
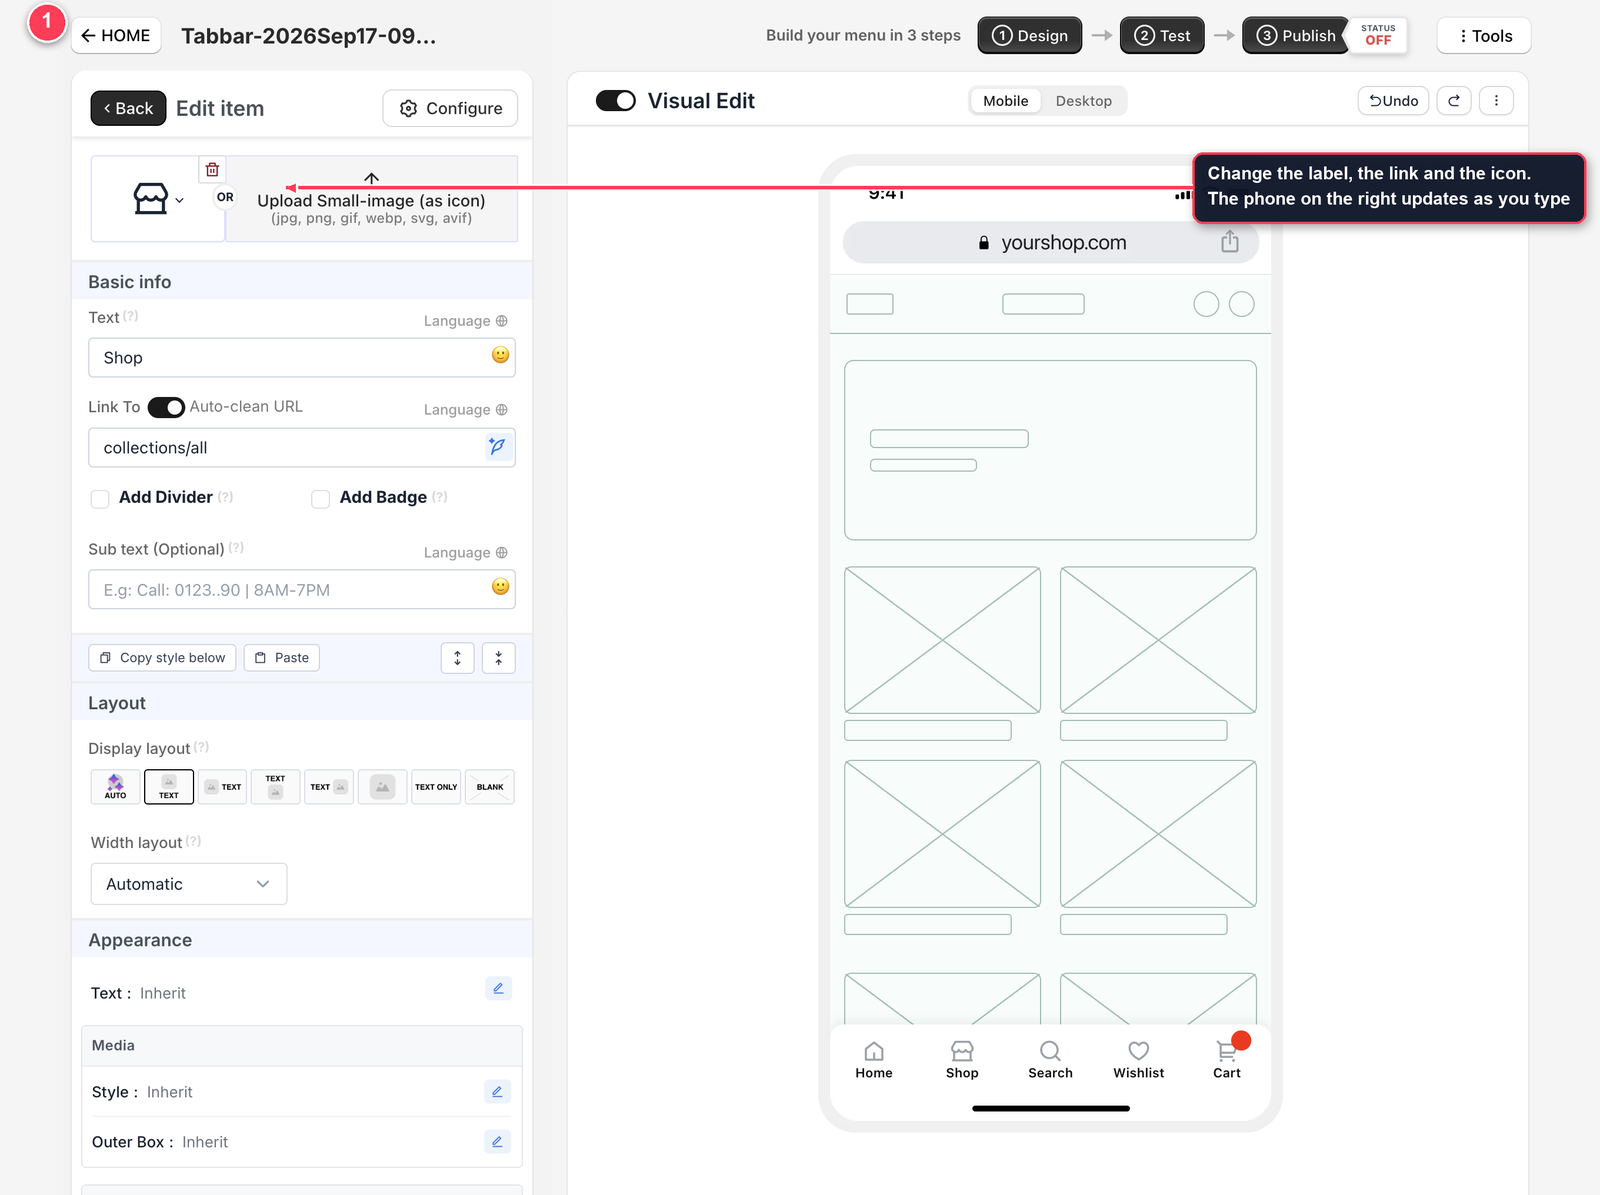
The editor has three tabs — Build, Style and Configure — with a live phone preview on the right that follows every change.
-
In Build, click an item to open it: change the text, point the link where you want, swap the icon, add a badge. Four or five items is the sweet spot — more than that gets cramped on a phone.
-
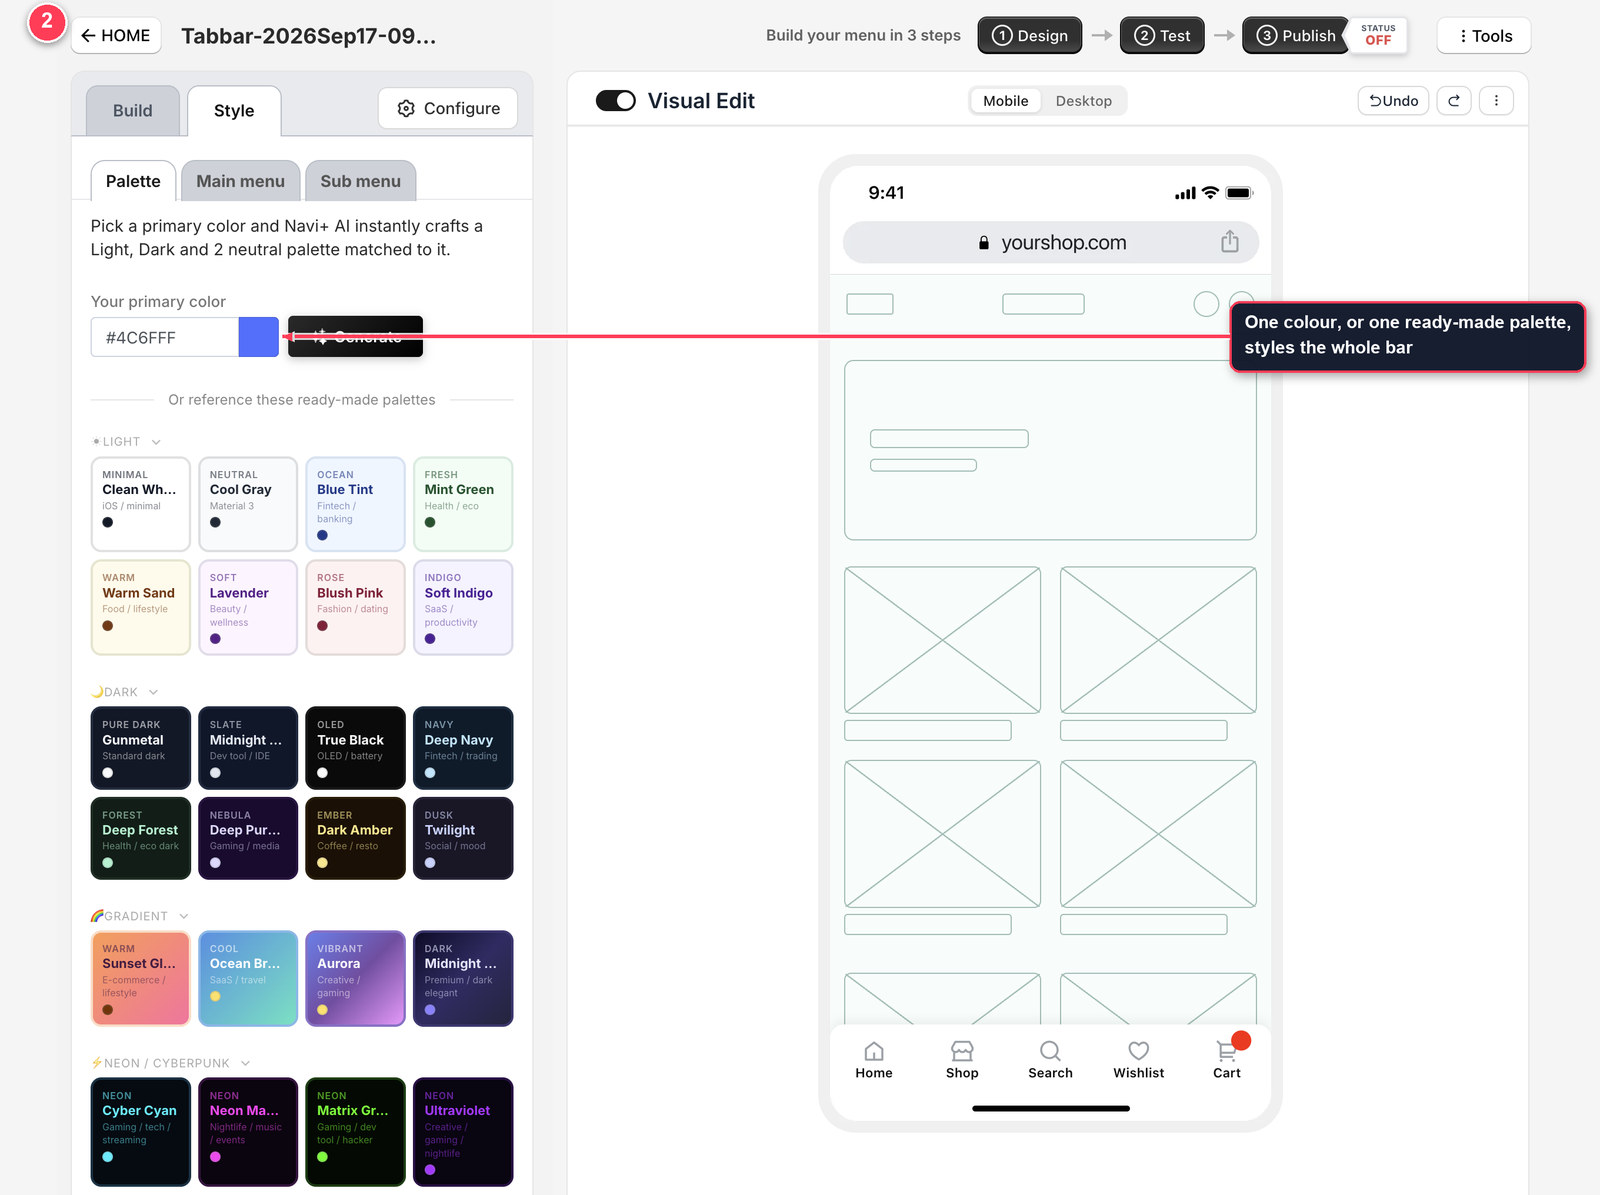
In Style > Palette, make the bar match your store in a few clicks. Type your primary colour and click Generate — Navi+ builds a light, dark and two neutral palettes around it. Or take a ready-made one: light, dark, OLED, gradient, and more. For most stores this single step is all the styling the bar needs.
-
Nothing is locked after that. Main menu and Sub menu open the full set of controls: font family, weight and size, text and icon colour, icon size, the gap between icon and label, spacing between items, bar height, corner radius, background colour or image and its opacity, shadow, badge colour — and animation per item. Change one thing or a hundred; the preview keeps up.
Use the Mobile / Desktop switch above the preview to see the bar on both screens before you publish.
3. Publish
-
Click Publish in the header — it reads STATUS OFF until the menu is live.
-
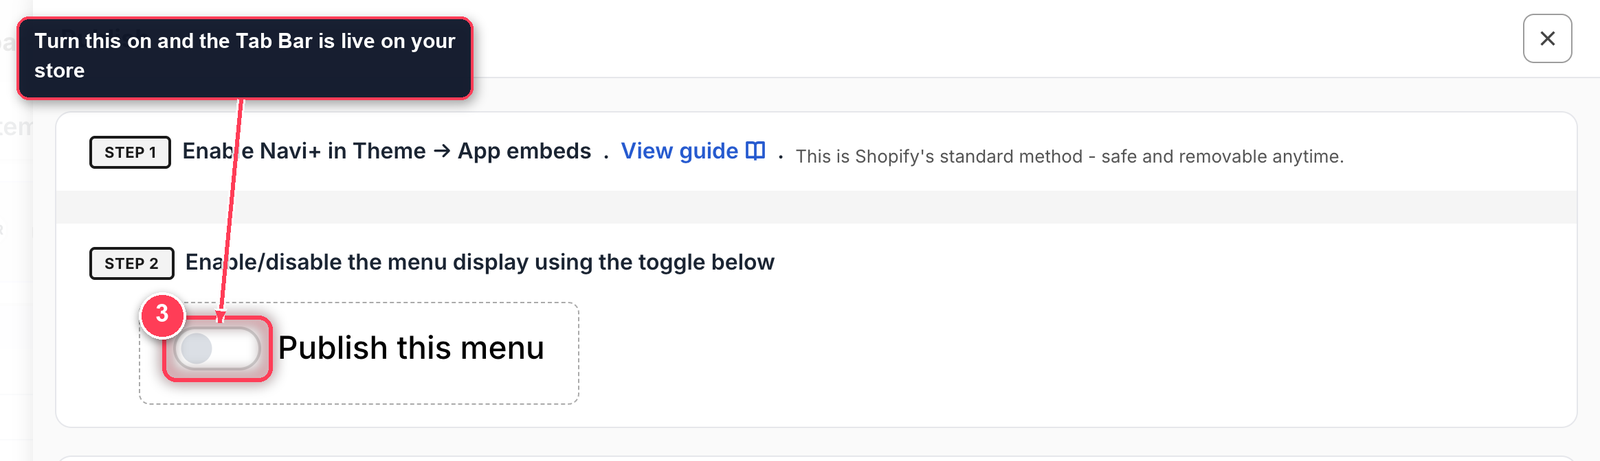
Step 1 confirms the app embed is on for your theme. If it isn’t, turn it on and come back.
-
Step 2 — turn on Publish this menu. That’s the whole thing: a Tab Bar needs no CSS selector and no theme edit, so it appears as soon as the toggle is on.
Check that it worked
Open your storefront on a phone — or from your Shopify admin, Online Store > Themes > ••• > Preview and narrow the browser window. The bar sits at the bottom of the screen and stays there as you scroll.
Nothing there? Menu not showing on your store? walks through the five checks in order.
Troubleshoot
Can I show it on some pages but not others?
Yes — display rules live in Configure: page groups (home, products, collections, pages, blogs) and URL keywords. See Display rules: pages, devices, URL keywords.
Can it behave differently on mobile and desktop?
Yes. Position, scroll effects (auto-hide and auto-show) and visibility are set separately for mobile and desktop, in Configure > Display.
Will the bar cover content at the bottom of my page?
No. Navi+ adds bottom padding to the page to reserve space for the bar. The one exception is auto-hide on scroll — the bar isn’t always visible then, so no space is reserved.
Will this change my theme code?
No. A Tab Bar is delivered through Shopify’s app embed — nothing is written into your theme files, and removing Navi+ removes the bar.
Did this page answer your question?
Need a hand? Chat with us in the app or write to [email protected] — send your store URL and the menu name and we'll look at it with you.